Tutorial Introduction
Prerequisites: None
Tutorial created the 04.24.2012 by M. Pelcat
Install Preesm
See Getting Preesm (prefer bundled releases or update-site over source code).
Open Tutorial Project
A Tutorial Project can be found here. The project needs to be imported in your workspace. To do so, follow these steps:
- Go to “File > Import…”
- In the wizard, select “General > Existing Projects into Workspace”.
- Click “Next”
- Select “Select archive file”, then “Browse…”
- Select the zip archive you downloaded
- Click “Next”.
Once these steps are completed, the unzipped project files can be accessed either from the “Package Explorer” view of Eclipse, or directly in the “Workspace” directory of eclipse (using your favorite browser).
Requirements for Running Tutorial Generated Code
All the tutorial generated code is built using CMake (see below). Most of the demos use PThread for parallel execution and SDL2 and SDL2_ttf for image and video manipulation. In addition, some materials have to be downloaded for proper execution (input video, fonts, …): follow the instruction given in Code/lib/ReadMe.txt and Code/dat/ReadMe.txt of each project to make sure that the required files are in the right place.
CMake
CMake is used to generate C compilation projects for Microsoft Visual, Codeblocks, Eclipse CDT… For more information on CMake, go to http://www.cmake.org.
Linux
On Ubuntu 16.04
sudo apt-get install cmake cmake-curses-gui
For other distributions, see appropriate documentation. Package names should be very similar.
Windows
Use installer from CMake Download Page.
Mac OS
brew install cmake
PThread
Pthread (POSIX Threads) library is used to obtain a portable code with threads. For more information on POSIX threads, see https://computing.llnl.gov/tutorials/pthreads.
Unix
PThread is bundled by default in almost all Linux / MacOSX distribution. If not, refer to your distribution documentation.
Windows
Use the pthread-2.10.0 version.
SDL2 and SDL2_ttf
Note: SDL2 is NOT thread safe. Make sure all read/display operations of your Preesm applications are always mapped on the same Core.
From SDL about page :
Simple DirectMedia Layer is a cross-platform development library designed to provide low level access to audio, keyboard, mouse, joystick, and graphics hardware via OpenGL and Direct3D.
Linux
On Ubuntu 16.04
sudo apt install libsdl2-dev libsdl2-ttf-dev libsdl2-image-dev
On CentOS 7.6
sudo yum install SDL2-devel SDL2_ttf-devel.x86_64
For other distributions, see appropriate documentation. Package names should be very similar.
Windows
Download the SDL2 development library (v. 2.0+) from libsdl.org. Do take the “Development library” and not the runtime library.
Similarly, download the SDL2_ttf development library corresponding to your IDE from SDL2_TTF Download Webpage.
Mac OS
brew install sdl2 sdl2_ttf sdl2_image
Understand the Inputs and Run the Workflow
The Introduction project contains folders with the name “Algo” for the algorithm model, “Archi” for the architecture model, “Scenarios” for the parameters and constraints of rapid prototyping, “Code” for the generated code, “Algo/generated” for the exported intermediate information, and “Workflows” for the different available rapid prototyping workflows.
The tested algorithm is a dummy graph called “TestCom”.
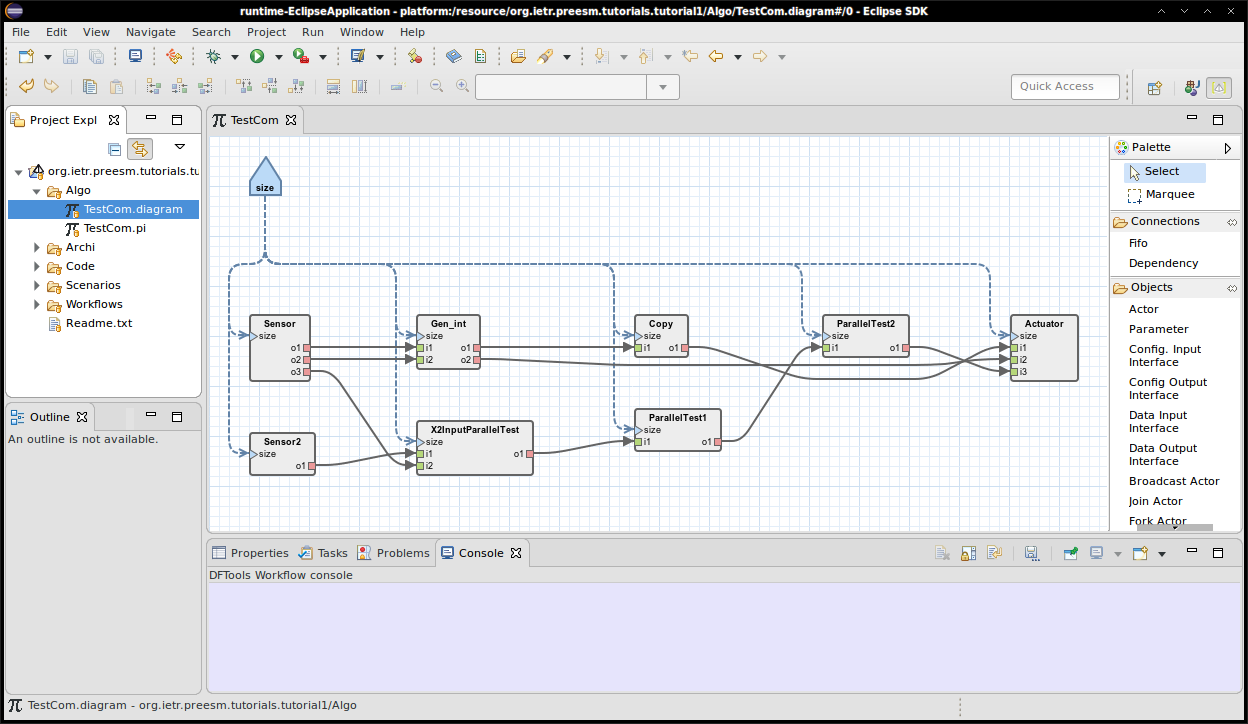
“size” is a parameter influencing the productions and consumption rates of tokens on the data FIFO queues.
A workflow is an executable graph that applies transformations to models. The workflow file available in Tutorial Introduction calls simulation and code generation for a dummy application running on 2 cores communicating via shared memory. To run the workflow, follow these steps:
- In the Project explorer of Preesm, right-click on the Codegen.workflow file in the “Workflows” directory
- Click “Preesm > Run Workflow”
- Choose the TestComPC.scenario file in the “Scenarios” directory
- A Gantt chart is displayed and you can find the code that has been generated in “/Code/generated”.
- The code can be compiled and run using MS Visual Studio, Codeblocks, GCC, Eclipse CDT… from “/Code”. Scripts are included for generating gnu Makefile, MS Visual Studio 2013 project or Codeblocks project.
The execution Gantt chart on two cores looks as the following figure.
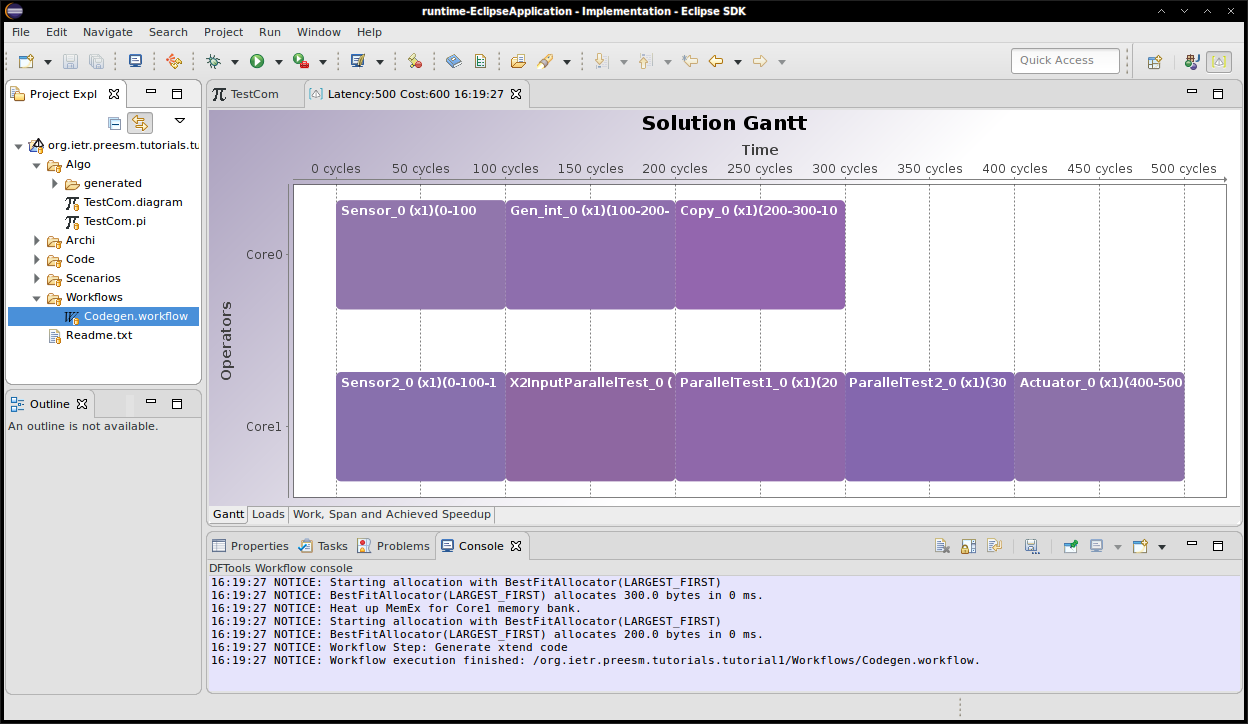
The obtained code simply displays OK if the data was correctly transmitted between data generators and data getters. You can look at the code in “/Code/generated” to understand its shape.
In order to study a more realistic application, try to parallelize the Sobel filter in the next tutorial.